Save time & money: Do your product photography in-house.
Or is it worth it?
If you’re like most business owners, you’re always on the lookout for ways to save money. One area where you can reduce expenses is by bringing your product photography in-house. Of course, this can be daunting, especially if you’re unfamiliar with photography basics. But with some planning and preparation, you can create product photos without spending a fortune. Here are a few tips to help get you started.
Bring your product photography in-house on a budget
Bringing your product photography in-house can be a great way to save money, but it’s essential to do your research to make sure you have the right equipment and skills. Here are a few tips to help you get started.
-
Reverse engineer the process
What kind of product pictures do you want to produce? Product shots on white? Lifestyle images? Once you know the style you are trying to reproduce, consider hiring a good product photographer to recommend the gear you need. I offer this service if you need to engage my photography consulting services. To contact me, click here.
-
Evaluate your product photography equipment needs
Before buying any photography equipment, strive to know the style you want to achieve in your photos. Then, add up the cost to acquire the gear you will need. Often when my clients discover the high equipment cost, they re-evaluate their plan to bring the photography work in-house.
-
Start Buying the Hardware and Software.
You will need photography gear, a computer and various software applications to get good results. Generally, I like to buy my equipment on Amazon because it is easier to buy there. You will also need to buy some tethering software to connect your camera to your computer, Photoshop to edit the product photos, and you should have a powerful computer with a graphic card and lots of memory to edit the images.
-
Learn Learn Learn
Photography is a trade, so there will be a learning curve to do it reasonably well. Learn how to use tethering software. Study how to use a camera and edit images in Photoshop. Learn how to light your product shots. Learn how to use a light meter and a grey card to colour-correct your pictures. There are many great videos on YouTube to learn and develop your product photography skills.
-
Practice Practice Practice
There is no substitute for hands-on practice when learning a new skill like product photography. Practice different lighting configurations and shooting methods to get competent at using a camera. Practice setting up workflows, lighting, staging and managing the software tools. Product photography can be a lot of fun, and you should experiment with different techniques and settings to see what works best for you. Don’t be afraid to try new things and experiment with your photography. You may be surprised at what you can create.
The Light Source you can use to make product photography
In my studio, I have many light setups, stands, screens and backdrops to facilitate my workflow.
Here are a few things you can do to take great product shots with minimal lighting equipment. The first is to find a good natural light source. You can use a window or lightbox to illuminate and diffuse your subject. The problem with natural light is that the sun’s light intensity and colour can shift. Using a make-shift lighting solution such as the sun can become very frustrating, primarily if you aim for consistent pictures. When you use natural light to photograph things, the sun moves, and clouds pass, shifting your exposure and white balance. It is annoying to shoot this way.
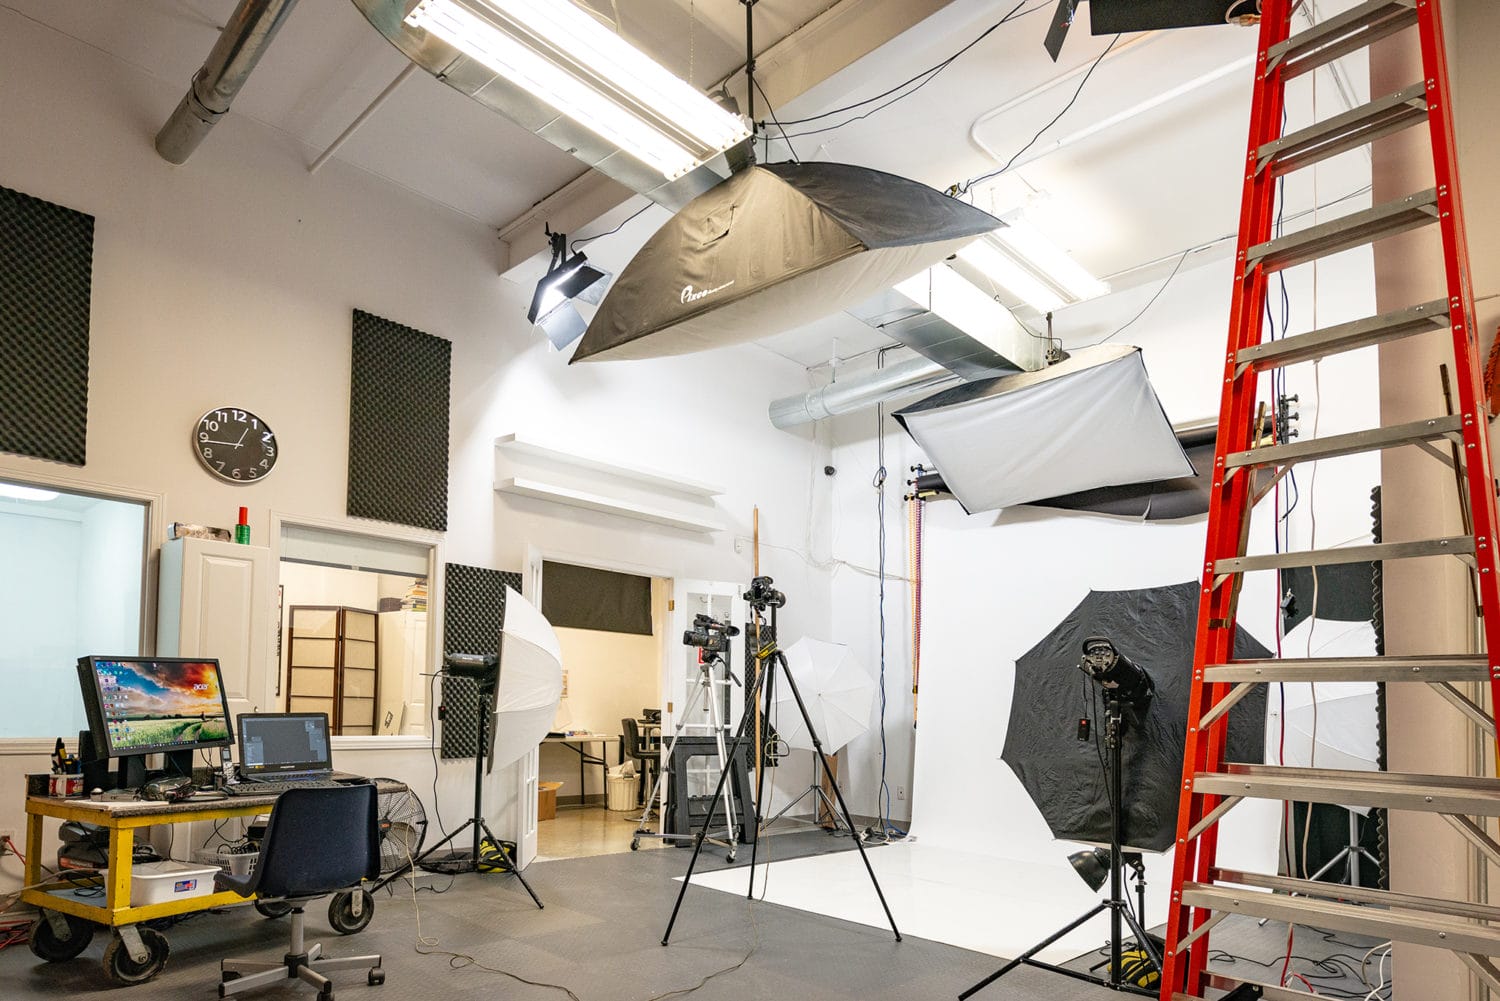
In my studio, I have many light setups, stands, screens and backdrops to facilitate my workflow.
Light has colour, so use a grey card to white balance your images. Otherwise, the product shots will not be colour accurate. I prefer to shoot with cameras that output RAW files so I can colour correct the colour temperature later when editing. I use a grey card as part of my workflow to measure the light intensity and light colour when I am editing in Photoshop.
The light sources I recommend to take better product photos
To get more consistent results, I prefer consistent product photography lighting solutions. I use 600-watt strobe lights on strobe stands with strobe diffusers and flash triggers. If you buy these, ensure the strobe lights have a compatible mount for the diffuser- otherwise, the diffuser might not fit onto the strobe.
On a typical day, my studio has seven lighting setups. I use different lighting configurations depending on what I am photographing. Put another way, there is no single way to illuminate every product shot.
I also like to use a light meter. When I take pictures, I want equal light distribution across the product, so I use a light meter to measure and balance the light intensity from all sides
Using a tripod to produce your product shots
Use a tripod to take your pictures. A tripod will help you avoid motion blur when hand-holding the camera, especially if you take pictures without a flash. A tripod will also help you take photos at a consistent angle of view.
Backdrops and Masking- creating product shots on pure white
You can use a backdrop or lightbox to do your product shots on white. I prefer to mask or clip out the background using Photoshop for the best results. To make product photograph on a pure white or with a transparent background, I use Photoshop or a clipping service.
The camera and software I to use for product photography
A good camera makes for a better photography experience. A small or amateur DSLR camera feels flimsy and has fewer control knobs to manage the camera. Better cameras also output better pictures. In my experience, more expensive cameras are more durable. I’ve dropped costly cameras, and I have dropped cheap cameras. The durable, expensive cameras always seem to survive best, but if you can, don’t drop your camera!
When you choose your camera, pick a brand with a reputation for excellent service. Canon and Nikon are very good at providing excellent customer service, while other vendors are less agreeable. Inevitably, your camera sensor will get dirty, and you will need to clean it. Some camera makers offer few options for sensor cleaning and may void your warranty if you do it yourself or use an unauthorized supplier.
Tethering Software for Product Photography
I use tethering software to preview and capture my photos on a computer when I shoot. Good tethering software often has a live view function so you can see what the camera can see via the computer screen. The live view is handy for food photography or any lifestyle photography with complex staging setups. When I can see my pictures on a large screen, I can compose better images and catch more mistakes before it is too late.
Lightboxes for Product Photography
When I photograph jewellery or silver, one of the best ways to take great product shots is with a lightbox. A lightbox is a container made of translucent material. You light the subject from outside the box to diffuse the light. I like light boxes for jewelry photography because it reflects white onto the metal to make the silver or gold whiteish. Since metals are reflective, you need to reflect white on them to have the classic silvery metallic look. I recommend buying lightboxes versus building one since they aren’t expensive.
Why I’m not fond of Lightboxes
A lightbox reflects white on the product and washes out the colour. Because lightboxes wash out the colour, I usually photograph the product on a clear acrylic table because the colours come out less tainted.
Substandard photography equipment will yield substandard results
I get it. Photography equipment is expensive. But the quality of your photography is only as good as the equipment you use. If you’re using old or cheap photography gear that lacks features or is outdated, you will get substandard results. You might be able to make do with a less expensive camera if you’re only taking casual shots or if you’re not too concerned with the quality of the photo. But if you’re looking to take professional-grade photos, you must use professional-grade equipment.
You don’t have to spend a fortune on the latest and most outstanding camera. Plenty of affordable options on the market will give you excellent results. But you need to make sure you’re using quality equipment if you want to produce quality photos. If you buy substandard equipment, it will break, you won’t like using it, you won’t use it much, and the output will not be any good.
Good photography requires skills that take time to learn
Good photography requires skills that take time to learn. It’s not something that you can pick up overnight. There are a lot of different techniques, skills, technologies, and principles that you need to know to take great photos.
One of the most important things to learn is how to use your camera. You need to understand the different settings and how to adjust them to get the results you want. You also need to be familiar with the different lenses and how to use them.
Another critical skill is composition. It would be best if you learned how to position your subjects and use the scenery to your advantage. You also need to understand design principles to create balanced and eye-catching photos.
Lighting is another crucial factor to consider. Learning how to use natural and artificial light to your advantage would be best. You also need to know how to control the light to get the desired results.
To learn product photography, you need to know the software to capture and edit pictures
Editing is an art. You need to learn Photoshop and how to edit photos. Once you know how to edit the pictures, you need to know which file formats are best for your publishing application.
Editing is necessary to make the picture look better. While many different software options are available, Photoshop, Lightroom, and GIMP are the most popular. Each of these programs has its own unique features and capabilities, so it’s essential to choose the one that will best meet your needs.
Once you’ve selected a software program, learning how to use it effectively is essential. This means studying the manual, watching tutorials, and practicing as often as possible. It may take some time to become proficient with the software, but it will be worth it when you start producing excellent images.
To do product photography, you need sufficient working space
If you want to do product photography, you’ll need a good amount of working space. You will need an area where you can spread your products and equipment without worrying about anything else.
If you don’t have a designated space for product photography, there are a few things you can do to create one. For example, you can clear a corner of your office or warehouse. Whichever route you choose, ensure the space is adequate for product photography.
To do product photography, you need to develop a workflow to efficiently capture and edit pictures
To take product photographs that are high quality, you need to develop an efficient workflow. This workflow should involve taking the pictures, editing them, and then uploading them. The following steps will help you create an efficient product photography workflow.
- Plan your shoot. Before taking pictures, plan out what you want to photograph and how you want to photograph it. Preparing will help you to stay organized and make sure that you get the shots that you want.
- Set up your shot. Once you have planned your shoot, set up your picture. Compose and arrange the products how you want them for the photo.
- Take the picture. Make sure to take test shots to correct the lighting and composition.
- Edit the picture with Photoshop. After you have taken the picture, edit the images. Colour Correct the images and clip out the background if applicable.
- Upload the picture. Once you edit the photo, you upload it to your website or online store. To maximize the use of your product photos, save the file in various formats:
- High-Resolution JPG
- Web-ready JPG
- Web-ready PNG with a transparency layer
- High-Resolution TIF with a transparency layer
Product Photography is a craft. Learning the equipment takes time to learn.
I remember when I first started product photography. I bought all the equipment I needed and started doing my product shots. The results were not what I expected. My images looked terrible. I didn’t know how to use the equipment and needed time to learn it.
Regarding product photography, there are a few things to consider. First, is it worth the investment to hire a professional photographer, or can you do it yourself? Second, will bringing in the task save you time and money? Maybe and maybe not.
There are pros and cons to hiring a professional and doing it yourself. Hiring a pro can be expensive, but they will likely have the experience and equipment to get the best shots. If you’re shooting your product photos, you’ll need to invest in some good equipment, and you will need to learn the proper photography techniques- and there is LOTS to know.
Whether or not bringing in the task of product photography will save you time and money depends on your situation. If you have the time and equipment to do it yourself, it may be more cost-effective to do it yourself. However, hiring a professional may be better if you don’t have the time or equipment.